Vinyl Sim effect Simulation (Samplers Roland SP-303 and SP-404)
[At the end of this post there are two audio files as an example, before and after this process being applied]
In case you're looking for a method to make LoFi in FL Studio, that is, to recreate a dark, "gritty" and vintage sound like those obtained from the famous Roland SP-303 and SP-404 Samplers used by iconic Hip Hop producers (such as J Dilla, Madlib, MF DOOM, Flying Lotus, etc.) and producers from the new wave of LoFi in recent years (such as Juan Rios, Made in M, Plusma, Bsd.u, Jinsang, etc.), this tip can definitely be helpful.
The first thing we have to know is that it is not mandatory to acquire any paid vst/plugin, since this method is done through the native Edison audio editor, included on all versions of the Image Line software
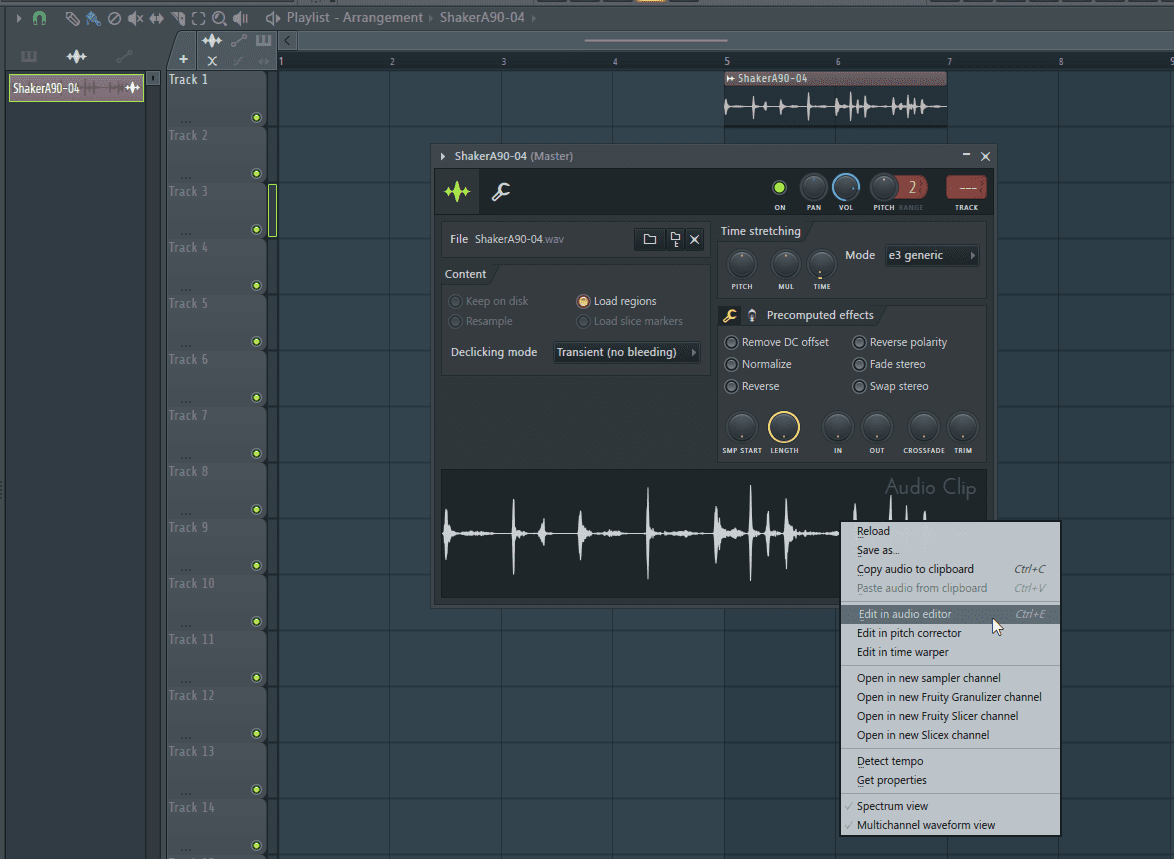
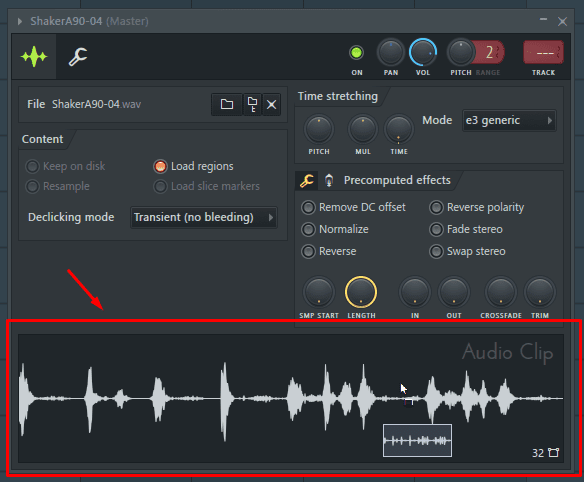
First of all, we have to double click on the sample of choice, whether it's drums, melodies, vocals, etc. Once the fruity wrapper is open (where we can change the pitch, duration, panning, and so on), we right-click on the waveform at the bottom and select the “Edit in audio editor” option.
Secondly, once Edison has opened, we right-click on the “Samplerate” section, which is usually at 44100Hz by default, but it all depends on the original sample, it can also be at 48000Hz or even less. This will open a new tab called “Sample properties”, where we can modify the title of the sample, as well as the samplerate, which is what we are going to do.
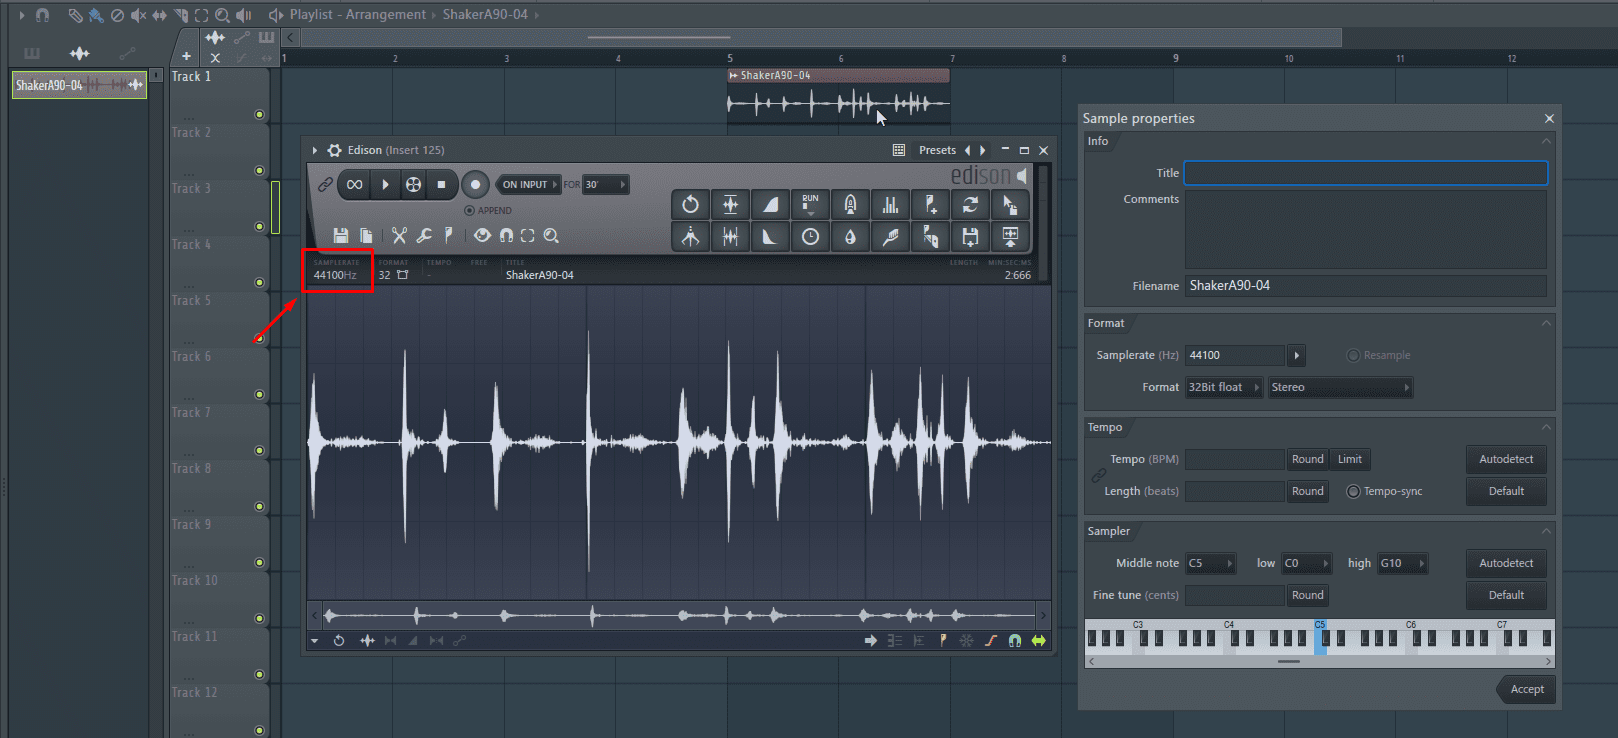
In this new tab we are going to lower the samplerate, which will reduce the samples per second of the sample of choice. In other words, the audio quality will be reduced, and its main characteristic is that, during this process, high frequencies/treble information is lost (which makes the resulting sound more "muffled", as we are used to hearing in Lo-Fi songs and beats.
Final Steps
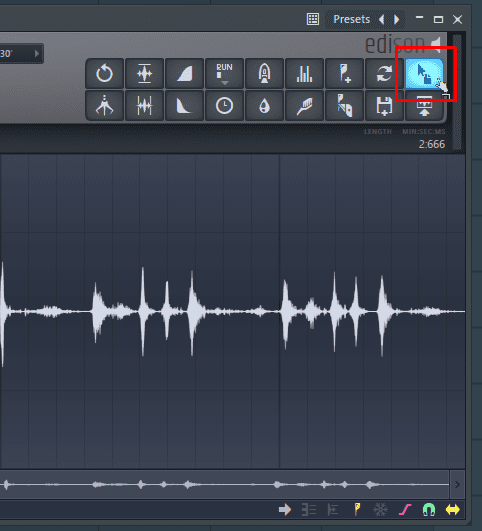
Lastly, it is important to know that there is no exact number. At the end of this post I am going to leave a sample of the before and after of an audio clip that was at 44100Hz and ended up at 22050Hz, since that is one of the options that FL Studio offers us when clicking on the arrow next to the Original samplerate, but after all, it's a matter of taste.
The lower the number, the greater the loss in audio quality. It is also important that after choosing the desired Samplerate, we click the gray button on the right that says "Resample", which is off by default. Once this is done, we click on accept, and the next thing will be to drag the new audio clip (now in Edison) towards the fruity wrapper at the beginning, to replace the original sample.

Last but not least, all that remains is to drag the new audio to the original fruity wrapper, that is, overwrite the sound at the beginning with the new one.
Results - Previews (44100Hz to 22050 Hz)
This is a quick and easy tip on how to make LoFi in FL Studio in 2023, although it is perfectly applicable to much older versions of the software.
We hope this article has helped and inspired you to tweak your current sounds and that you can start developing your LoFi aesthetic right away.
Versión corta en video:
Morabeats – 2023.